Planning your garden
You probably have some idea of what you want in your garden – plants, deck, barbecue area, pergola and greenhouse, even a vegetable garden. So many ideas running around your head.
It is best to start by taking an objective look at your garden. Measure it. Think about how different areas will work. Then do a rough sketch with the measurements added. From this, you can make a master plan.
Once you have your plan you can do the work as quickly or slowly as you want. If you think you don’t need to plan, think again. You may end up with serious problems and an environment you don’t like.
Measuring your garden
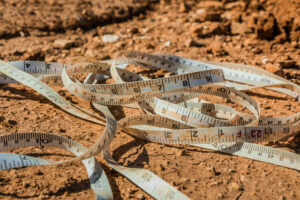
Measuring your garden can be quite daunting. If you can, start out with a site map of your property. See your builder or go to your local council office. This site plan should have your entire property drawn to scale. Keep in mind that you need to design your garden not only to suit your requirements but also to suit the style of your home.
The main point of the site map is to make sure you know where your services are – water, power, telephone. Check your house is in the correct position. Also, check the north indicator on the map is actually pointing north. Check all other measurements for accuracy. If everything checks out you have a basic landscape plan already. Keep it as a reference as you start designing.
If you cannot get a site map then simply use graph paper. When you buy your graph paper, make sure the grids match the scale you want to use. The most commonly used scale is 8:1 or 10:1. This is the equivalent of 8 or 10 feet per inch on your plan. Make sure you can fit your entire plan onto one sheet of paper.
Start by positioning your house on the graph. To do this measure the front corners of your house to your front boundary line; then measure from the front corners of your house to the side boundary lines. Measure the angles and exterior walls going from corner to corner. Write down the measurements then draw them onto your graph. Now you have a map of your front garden.
Now for the back garden. Measure from the back corners to the back and side boundary lines – include any paths, driveways, patio, barbecue areas. Add in anything that already exists. Work out what you want to keep and what you want to get rid of. Draw everything to scale on your map.
Now you have a starting point, get half a dozen photocopies of your plan. You need them later on.
Designing your garden

You probably already have ideas about what you want to do and some favorite plants you want to plant. But, take a look around your neighborhood. What gardens work? Why? What do you like and what don’t you like?
Do an analysis of your property – Do you need gates? Do you need good lighting for security? What about fencing? What trees are staying? Do you want to enjoy your garden at night with appropriate garden lighting? What is the best aspect of the property and how do you take advantage of it? What do you and your family need in your everyday lifestyle?
Think about styles and themes – Japanese, English traditional, rose gardens, wildlife attracting gardens. When you see something you like make note of it. When looking at other people’s ideas the point is to get ideas; take elements and incorporate them into your own garden design. Take a look at your home and look at what would improve and complement the style of your home. Start with that.
Check out books, your local library, the internet and your neighbor’s gardens for ideas for your home.
Make your master plan
Take out a copy of your site plan to use as a rough sketch and a soft pencil for drawing in shapes. Put tracing paper over your site plan and start drawing loose shapes to represent your ideas. Keep in mind your site analysis and the natural movement through your gardens. Take a walk around your property and work out how you will get to different areas easily – gates, fences, sheds, barbecue area, garden walls, pool. Put them on your sketch.
You should already have a good idea of the environment you want to create but still not thought about the plants. At this stage you may just look at areas and visualize flowers in one area, shade trees in another, a vegetable garden somewhere else. When you put your paths onto your sketch remember their borders can be used as the borders for garden beds. Make your paths meander rather than straight for a softer feel.
Also, consider your property’s drainage. Do you need to change the way your land slopes for better drainage of any new areas? Will you need stairs, retaining walls or terraces; consider drainage for any water features.
Now you have all the necessary elements in place, create highlights for your garden – for example, water features, pergolas, outdoor living areas. You can create entire rooms or themes around these elements.
Go outside and visualize your plan for each area and as a whole. Look at it. Does it work? Can you feel it? Bring it alive by staking out areas or use the hose to mark out pathways and garden beds. Make changes on your plan and take down any ideas as you go.
Now it is time to clean up your plan. Take another copy of your original site plan and trace your design onto it. Mark all the base elements such as paths, driveways, existing structures and trees, and your boundary lines. Add the areas you want to create. Label them with the construction materials you’ll use.
Now choose the plants. You will probably already know what you want but here are some guidelines to help you. Add plants to your design and label them.
Just one more step. Make another copy of your master plan and layout your irrigation system. Your local irrigation supplier can help you with this. And add any lighting requirements for paths and ponds.
Your design is now finished, and you have a complete working plan of your vision for your everyday environment. Now think about what materials need delivering before you start. Which part to start on first?


