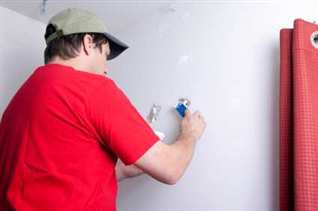
Wall damage is one of the most common types of interior damage that occur in the home. Most internal walls are covered in either plasterboard or render (on block or brickwork), but some old homes also have laden plaster and fibrous plaster as the finished wall surface.
Plaster surfaces are by nature soft, and over time (due to bumps and structural movement) plaster will crack and present holes in both walls and ceilings. Holes from picture screws, gaps between cornice and walls, and accidental damage are perhaps the most common problems that a home owner will come across.
Internal wall lining types
It’s quiet easy to work out what type of plaster you have on your walls by touching, feeling and viewing the surface. The most common types of plaster in Australia (in order) are:
- Plasterboard –This is the most popular type of internal wall surfacein Australia. Sheets are applied directly to stud wall frame.
- Cement render or solid plaster –Cement or plaster is applied directly to block or brickwalls, then painted.
- Fibrous Plaster – typical in old buildings.Hand made sheets containing horse hair.
- Laden plaster – the oldest form of plaster work,is a wet slurry of gypsum & horse hair applieddirectly to timber wall boards.
All of the above plaster types can be repaired or patched by using the correct cornice adhesive, a multipurpose compound, or a combination of the two. You will need to speak with a supplier of plaster products to ensure you purchase the correct product for your job. Ensure you take a small sample of your wall (or a few close up pictures) to show your plaster supplier. Also – be aware that all plaster types have a different textured finish. For example multipurpose compounds are generally smooth and cement render looks gritty. If you use a plaster that does not have matching texture you will see the patch even after it has been painted.
What you will need

Here is a complete list of the items you will need:
- A multi purpose compound
- Cornice cement/plaster
- Fibreglass tape
- Sandpaper – check with plaster supplier to see what grades you will need for your job.
- Mixing Pot
- Plastic or metal joint knives (100 mm and 200 mm wide)
- Stanley Knife
- Stiff brush
- Sanding Block
Many of these items will already be in the tool kit of the home DIY enthusiast. If not these items are inexpensive and easy to source.
Preparing your plaster surface
It is essential to prepare the surface before you apply your plaster fill product. Rub the surface with a stiff brush, then follow the plaster manufactures instructions for plaster application. They may require that you apply a liquid bond agent to ensure the plaster adheres correctly.
Laden and cement render repair
Now you’re ready to fill your damaged wall.
Apply your plaster with a joint knife and make the wet plaster a flat as possible, but don’t be too precious you can add another layer later. Allow the plaster dry as recommended and sand back with lowest grade of sandpaper recommended. You may need to add another layer of plaster if there are holes or bubbles in your first layer. Sand back again once dry and use a finer grade sandpaper to make the patch smoother.
Your wall is now almost ready for painting, ensure you dust off any residual plaster dust before painting otherwise your paint will peel.
Plasterboard and fibrous plaster repair
The procedure for this type of surface is the same as above, with one important difference – the plaster is in sheet form. You may need to replace an entire section of the wall keeping in mind where the stud wall frame is located behind (it is difficult to adhere plasterboard to a wall without support). If you need to replace a large section and perform a neat job use a Stanley Knife to cut down the middle of the wall studs and noggings closest to the damage. Pry out the large damaged piece and use it as a temple for the new piece of plasterboard. Replace the damaged piece with new and use specialised glue and nails to secure. Use the Laden and Cement Render Repair technique above to fill the gaps.
Once your plaster repair is complete its time to start painting!


