Wallpaper options
Gone are the days when you hear the word ‘wallpaper’ and you think of old English homes with a faded floral brocade on every wall. In fact, if we look further into the past, we’d be surprised about the extent to which wallpaper was used in homes to create glamour and decadence.
A bit of history
Wallpaper has its origins in the 15th century, where artisans did not have the luxury of computers or technology to create their imagery. Designs were hand painted or stencilled, and perhaps were flocked, embossed, or gilded in gold, or painted in watercolour. Originally, wallpaper was produced as small single sheets, which in some cases were intended to be used alone, and in others were joined to form a continuous design. Only the homes of the wealthy could afford this high-end art.
Over time, technology allowed for more cost-effective production, where screens were created to reproduce the design down the roll, so that when applied to the wall, a repeated pattern was formed. This cost cutting allowed a greater accessibility to the wider population. Today, we have seen even further technological advances, where wallpapers can be digitally produced and printed onto vinyl or paper; or it can be machine printed by hand. Yet despite this, several wallpaper producers still subscribe to the art of screen printing, where craftsmen work their way down 30 metre tables, screen by screen.
The 4 steps of DIY wallpaper…
So if you’re going to take on a wallpapering job yourself, what do you need to know? Here’s 4 easy steps for the DIYer, ready to go?
Step 1. Choosing the right wallpaper
When it comes to choosing the right wall paper consider the following to help you choose the right one:
Mood and balance
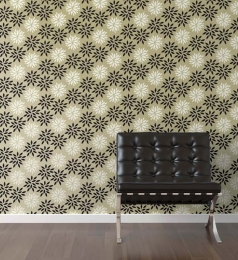
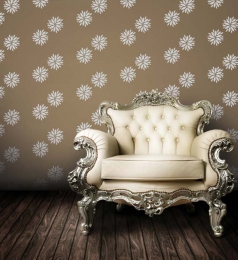
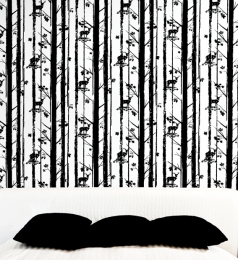
What is the purpose of the room? If it is meant to be a relaxing haven or where the emphasis is on other items in the room, you would more than likely want wallpaper that has neutral tones/ colourways or an uncomplicated design that doesn’t compete for attention. If it is a modern, edgy feel you are after, bold colours and striking imagery can work well. If the room is sparsely furnished, or has neutral tones throughout, a vibrant wallpaper can provide a point of difference to liven up the space. To achieve a feeling of luxury, you may want to go for something metallic or glossy, for a feeling of warmth, you should choose a paper with warm colours.
Durability
Choose something that reflects the usage of the room. If it’s a high traffic area, choose a wallpaper that is durable, not too delicate, and easy to clean. Most wallpaper companies have different options to choose from. For less traffic areas such as a bedroom, you may want a more delicate paper finish. For bathrooms and wet areas, check with your interior designer or the wallpaper company whether a particular wallpaper is suitable for the purpose you require.
Samples
Request samples of the designs that interest you. Put them together with other elements in the space such as fabric, paint colours, images of the furniture you want to use etc to see how they look together. Don’t be afraid to experiment with sampling – choose at least one wallpaper that seems a little ‘far out’ – you might be surprised.
Get a second opinion
Have you ever been out shopping for clothes and a friend or shop assistant says ‘go on, just try this on’, and you’ve been surprised how good it looks? The same applies for selecting wallpaper. Put together a few concepts and get a second opinion from a friend, architect or a professional colourist – sometimes it takes someone else’s perspective to see things in a new light!
Costs
Set yourself a budget. Wallpapers vary greatly in price, but just like paints, the stronger, harder wearing products are generally more expensive.
Step 2. Preparing the wallpaper
Preparation is king. Most wallpaper companies recommend professional installation, as this will achieve the optimum result and will avoid issues that the inexperienced hanger may encounter. However, preparation is key, and there are some simple things you can do to ensure the wall is ready:
a. Lightly sand newly plastered or renovated walls, seal using a good quality water-based wallboard sealer, and apply a solution of size. Strip old walls of any existing wallpaper, wash down and size.
b. All walls should be clean and dry and free from mould, dust and grime. Clean mould areas with a household bleach. Check that your paste contains an anti-mould additive.
c. Wherever possible, cross line walls with lining paper.
d. Eliminate any colour variances on the wall by using lining paper, or even out the colour variances with a coat of paint of a similar colour to the paper to be applied.
Note: Primer is a sealer applied to the wall before the wallpaper which prevents the paste from absorbing into porous surfaces, and allows the paste to grip on slick surfaces. Sizing provides additional grip for better adherence and more slip for ease of sliding each strip into position on the wall.
Batch check It is important to check that all rolls you have are from the same batch and there are no defects. As opposed to digitally printed wallpaper, screenprinted wallpaper may characteristically have minor variations within a batch due to the human element, and as such is not considered a defect, but something that makes the wallpaper unique. If there is a major defect, do not hang and contact your wallpaper supplier immediately. Most wallpaper suppliers do not accept rehanging charges for more than the first roll.
Step 3. Trimming the wallpaper
Some wallpaper is supplied trimmed and ready to hang, and others are supplied untrimmed. If untrimmed, look for trim marks, which are inset from the colour edges. For gyprock walls, it is recommended that wallpapers are wall trimmed using the ‘double-cut’ trimming method, so that the best possible joining of drops can be achieved. For rendered walls, it is recommended that wallpapers are table trimmed, not wall trimmed. Ask your wallpaper supplier or installer about the double-cut trimming method.
Step 4. Wallpaper application
Following are some general guidelines to ensure successful installation. Instructions are usually provided with your order, and the professional wallpaper hanger should read through them to acquaint themselves with the product.

a. Cut each drop of paper 10 – 15cm longer than the wall depending on the pattern repeat to ensure the pattern matches up.
b. Check with the wallpaper supplier which paste they recommend. Generally using Roman Pro 880 paste will ensure a good result. Allow approximately 1 litre per roll mixed to a thick consistency, eliminating lumps as you mix.
c. Depending on the type of wallpaper you select, either apply paste directly on the wall surface with a brush or roller, ensuring the area covered is slightly more than the width of the drop. Or, spread the paste evenly over the wallpaper drop ensuring edges are well pasted. Do not paste more than one drop ahead. Allow the paper to relax for 3-5 minutes.
d. Starting at the top, press the drop to the wall firmly, and with a soft lay or wallpaper brush, or damp sponge, work your way from the centre out and down the drop smoothing air bubbles as you go. Have a bit of surplus at the top and bottom, and ensure the pattern repeat matches horizontally as you hang each drop. Trim using the double-cut trimming method without cutting into the wall surface beneath.
e. Butt the seams accurately and firmly and do not overlap. Once the seam is butted, use a seam roller. Hold a piece of plain white paper between the roller and the surface to avoid damaging or shining the surface. This ensures that the area will key quickly to the wall, as any excess paste will be squeezed away. Be very careful not to overwork the edges.
f. Carefully trim the surplus paper top and bottom with a straight edge and sharp wallpaper knife. Use a damp clean cloth or sponge to remove any paste on the surface before allowing the wallpaper to dry. After hanging 2 or 3 drops, carefully check for any shading variations across the drop.
g. Allow time for drying to complete naturally with adequate natural ventilation. Air conditioning can cause wallpaper to shrink while drying, and never use heat or force dry. Shade windows where direct sunlight will cast over a drying wall.
Step 5. Cleaning
Your wallpaper supplier will provide guidance on how to clean their specific wallpaper. Generally, a damp clean sponge or soft cloth may be used to wipe evenly over the surface. However spot cleaning is to be avoided.

A final note
We all have a relationship with the spaces we live, work and play in, and at the end of the day, choosing a wallpaper is part of defining that relationship. As more and more people are becoming adventurous in their interior definition and challenging past norms, it is exciting to see spaces being created and re-created… It’s a lot of fun, and hugely inspiring.
Wall decals
Wallpaper too hard? Consider wall decals.


